Have you ever wondered how to achieve the juiciest, most flavorful chicken? We’ve cracked the code with our ultimate chicken brine recipe. Brining has a significant impact on the texture and taste of poultry, making it a game-changer for home cooks and professional chefs alike. Our method combines the perfect balance of salt, sugar, and aromatic ingredients to create chicken that’s moist and packed with flavor.
We’ll guide you through the entire process, from understanding the science behind brining to mastering the step-by-step technique. You’ll learn about the essential ingredients that make our brine recipe stand out, including a secret touch of honey for added sweetness. We’ll also share tips on how to brine chicken properly, ensuring you achieve consistently juicy results every time. By the end of this article, you’ll be ready to transform your chicken dishes into memorable culinary experiences.
The Science Behind Brining
Brining is a simple yet effective technique that can transform your chicken from ordinary to extraordinary. We’ll dive into the fascinating science behind this process and explore why it’s so beneficial for creating juicy, flavorful poultry.
How Brining Works
At its core, brining involves soaking meat in a salt water solution. The magic ingredient here is salt, which plays a crucial role in improving the texture and taste of the chicken. When we immerse chicken in a brine, a fascinating process called diffusion takes place.
The salt in the brine solution starts to break down the muscle fibers in the chicken. This relaxation of the muscle structure creates tiny gaps where water can flow in. As a result, the chicken absorbs some of the liquid from the brine, which is why brined chicken often weighs more than it did before the process.
But it’s not just about adding water. The salt also causes changes at the molecular level. It modifies the proteins in the chicken, allowing them to bind water more tightly. This is crucial because it means the chicken will retain more moisture during cooking, leading to juicier results.
Interestingly, the concentration of salt in the brine matters. A solution with about 5 to 6% salt concentration has been found to be most effective. This level of salinity allows for optimal protein modification without causing the muscle fibers to contract and squeeze out water.
Benefits of Brining Chicken
Now that we understand how brining works, let’s look at why it’s so beneficial for chicken:
- Increased Moisture: Brined chicken can absorb up to 10% of its weight in brine. This extra moisture makes a significant difference in the final cooked product, resulting in juicier meat.
- Enhanced Flavor: The brine doesn’t just add salt; it can also infuse the chicken with other flavors. Adding ingredients like honey, herbs, or spices to your brine recipe can impart subtle yet delicious notes to the meat.
- More Forgiving Cooking: Because brined chicken starts with more moisture, it’s more forgiving if you accidentally overcook it a bit. This makes it easier to achieve perfectly cooked chicken, especially for less experienced cooks.
- Improved Texture: The salt in the brine helps to break down some of the tough muscle fibers, resulting in more tender meat.
- Even Seasoning: Unlike surface seasoning, brining seasons the chicken all the way through, ensuring flavor in every bite.
By understanding the science behind brining, we can appreciate why this simple technique has such a profound impact on our chicken dishes. In the next section, we’ll explore the essential ingredients for creating the ultimate chicken brine, so you can put this knowledge into practice and start enjoying juicier, more flavorful chicken.
Essential Ingredients for the Ultimate Chicken Brine
Creating the perfect chicken brine recipe involves a careful balance of key ingredients. We’ll explore the essential components that make up a great brine, ensuring your chicken turns out juicy and flavorful every time.
Salt and Water Ratio
The foundation of any chicken brine is the salt and water ratio. This combination is crucial for the brining process to work effectively. A general rule of thumb is to use about 4 tablespoons of kosher salt per 1 quart (4 cups) of water. However, if you’re using fine table salt, you’ll want to reduce this amount to 3 tablespoons.
It’s important to note that the type of salt you use matters significantly. Kosher salt is the preferred choice for brining. Table salt has finer grains and measures differently, which could result in your chicken becoming too salty. If you only have table salt on hand, use half the amount called for in the recipe.
The salt concentration in the brine should typically be between 3-6%, with 4-5% being ideal. This level of salinity allows for optimal protein modification without causing the muscle fibers to contract and squeeze out water.
Flavor Enhancers
While salt and water are the only non-negotiable ingredients in a chicken brine, adding flavor enhancers can take your brine to the next level. Here are some popular additions:
- Sugar: Adding sugar helps balance the saltiness of the brine. You can use granulated sugar, brown sugar, or even honey. About 2 tablespoons of sugar per quart of water is a good starting point.
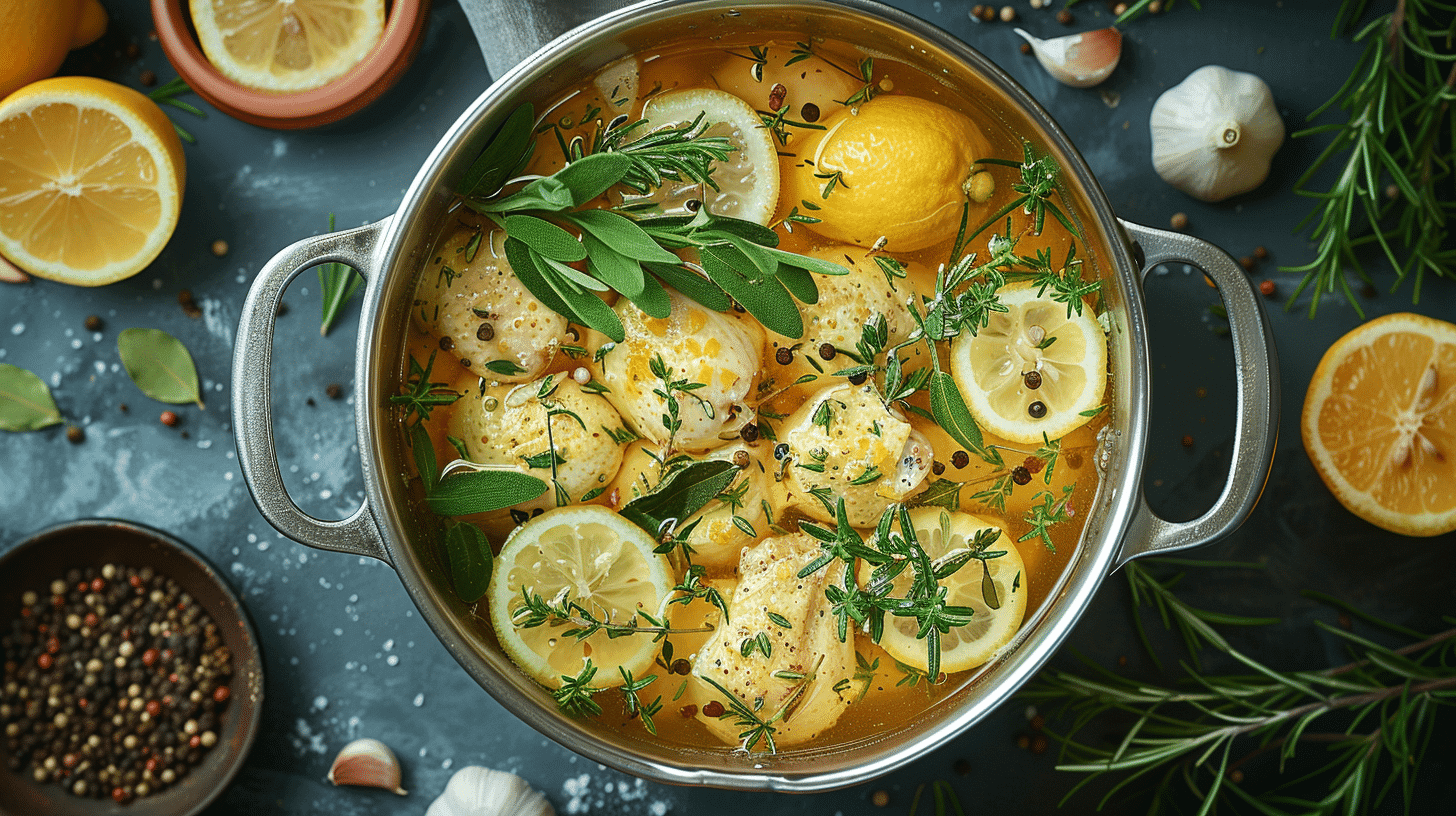
- Herbs and Spices: Fresh herbs like rosemary, thyme, and parsley are common additions. You can also use dried herbs or experiment with different combinations to suit your taste.
- Aromatics: Garlic, lemon slices, and bay leaves are popular choices for adding depth to your brine.
- Soy Sauce: This adds a savory umami flavor to your brine.
Optional Add-ins
To further customize your chicken brine recipe, consider these optional add-ins:
- Citrus: While lemons are commonly used, you can experiment with oranges or grapefruits for a different flavor profile.
- Peppercorns: These add a subtle spicy note to your brine.
- Honey: A touch of honey can add sweetness and help with browning during cooking.
- White Wine: This can add complexity to your brine’s flavor.
Remember, the beauty of brining is its flexibility. You can adjust the ingredients to suit your preferences or to complement the flavors of your final dish. Whether you’re preparing chicken for smoking or roasting, a well-crafted brine can make a significant difference in the juiciness and flavor of your chicken.
Step-by-Step Brining Process
Now that we understand the science and ingredients, let’s dive into the actual process of brining chicken. This step-by-step guide will help you create juicy, flavorful chicken every time.
Preparing the Brine Solution
To start, we need to create our chicken brine recipe. Here’s a simple method:
- In a large pot, combine 4 cups of cold water with 4 tablespoons of kosher salt. If you’re using table salt, reduce this to 3 tablespoons.
- Add 2 tablespoons of sugar to balance the saltiness.
- For extra flavor, you can add aromatics like crushed garlic cloves, peppercorns, or fresh herbs.
- Stir the mixture until the salt and sugar dissolve completely.
- If you’ve added any aromatics, bring the solution to a simmer to release their flavors, then turn off the heat and let it steep for about 30 minutes.
- Cool the brine completely before use. You can do this by adding ice or refrigerating it.
Submerging the Chicken
Once your brine is ready and cooled, it’s time to submerge the chicken:
- Place your chicken in a container large enough to hold it and the brine. A large stock pot or food-grade bucket works well.
- Pour the cooled brine over the chicken, ensuring it’s completely submerged. If needed, weigh the chicken down with a plate.
- If you’re short on space, you can use a large zip-top bag. Place the chicken and brine in the bag, squeeze out the air, and seal it tightly.
Brining Time and Temperature
The brining time and temperature are crucial for achieving the best results:
- For optimal flavor and texture, brine your chicken for 30 minutes to 1 hour. This timeframe provides the perfect balance of seasoning and moisture without making the meat too salty.
- If you’re brining for 30 minutes or less, you can leave the chicken at room temperature. However, for longer brining times, it’s essential to refrigerate to prevent bacterial growth.
- For food safety, always ensure your brine is cold before adding the chicken. This helps prevent the growth of harmful bacteria.
- If you’re brining a whole chicken, you might need to extend the brining time. A good rule of thumb is to brine for about one hour per pound of meat.
- Don’t brine for longer than 24 hours, as the chicken can become too salty and the texture may change.
Remember, brined chicken cooks faster than non-brined chicken, so keep an eye on it during cooking. Once you’ve finished brining, remove the chicken from the solution, pat it dry thoroughly, and you’re ready to cook your juicy, flavorful chicken using your preferred method.
Tips for Perfectly Brined and Juicy Chicken
We’ve covered the basics of creating the ultimate chicken brine recipe, but there are some additional tips and tricks to ensure your chicken turns out perfectly juicy and flavorful every time. Let’s explore some best practices and common mistakes to avoid when brining chicken.
Avoiding Common Mistakes
One of the most crucial aspects of brining chicken is getting the salt concentration right. A typical chicken brine recipe calls for about 4 tablespoons of kosher salt per quart of water. If you’re using table salt, reduce this amount to 3 tablespoons to avoid over-salting. Remember, the type of salt matters significantly, so always measure carefully.
Another common mistake is brining for too long. While it might seem like longer is better, over-brining can lead to overly salty and spongy chicken. For optimal results, brine chicken breasts for 30 minutes to 1 hour. This timeframe provides the perfect balance of seasoning and moisture without compromising texture.
When brining a whole chicken, adjust the time accordingly. A good rule of thumb is to brine for about one hour per pound of meat. However, never brine for longer than 24 hours, as this can negatively affect the chicken’s texture and flavor.
Best Practices for Roasting Brined Chicken
After brining, it’s essential to pat the chicken dry thoroughly before cooking. This step helps achieve crispy skin, especially when roasting. For even crispier results, you can leave the brined chicken uncovered in the refrigerator for a few hours or overnight to allow the skin to dry out further.
When roasting brined chicken, keep in mind that it cooks faster than non-brined chicken. To prevent overcooking, use a meat thermometer to check for doneness. The internal temperature should reach 165°F (74°C) in the thickest part of the breast.
For added flavor, consider incorporating honey into your brine recipe. A touch of honey can enhance browning and add a subtle sweetness to complement the savory notes. Just be sure to balance it with the salt in your brine.
Remember, brined chicken doesn’t need additional salt during cooking. If you’re using a rub or seasoning blend, opt for a salt-free version to avoid over-seasoning.
By following these tips and being mindful of common pitfalls, you’ll be well on your way to mastering the art of brining chicken. With practice, you’ll consistently achieve juicy, flavorful results that will elevate your chicken dishes to new heights.
Conclusion
Mastering the art of brining chicken has a profound impact on the quality of your poultry dishes. This simple yet effective technique enhances flavor and ensures juicy results every time. By understanding the science behind brining and following our ultimate chicken brine recipe, you’re well-equipped to elevate your cooking game and impress your guests with consistently delicious chicken.
Remember, the key to success lies in balancing the salt concentration, choosing the right flavor enhancers, and timing the process correctly. With practice and attention to detail, you’ll soon be creating chicken dishes that are bursting with flavor and moisture. So go ahead, give our brining method a try, and get ready to enjoy the juiciest, most flavorful chicken you’ve ever tasted.
FAQs
1. Does soaking chicken in brine enhance its juiciness and flavor?
Yes, brining chicken significantly enhances its moisture retention and flavor. Although it requires more effort than simply applying a spice rub, the resulting juicy and flavorful chicken is well worth it. Brining involves immersing the meat in a saltwater solution, which can be enriched with additional flavors beyond just salt.
2. What is the recommended salt-to-water ratio for a chicken brine?
A standard brine ratio is 4 tablespoons of kosher salt per quart (4 cups) of water. If you’re using fine table salt, you should use 3 tablespoons instead, due to its higher density. Remember that the saltiness can vary between different brands of kosher salt.
3. How long should chicken remain in a wet brine?
Chicken should be left in a wet brine for up to two days, although a minimum of 12 hours is necessary for the brine to be effective. This duration allows the brine to thoroughly season the meat without it becoming too salty. If you prefer not to use a wet brine, you can omit the water.
4. Should chicken be rinsed after removing it from a wet brine?
Rinsing chicken after brining is not necessary if you use the general brine formula of 1/4 cup kosher salt per quart of water and do not over-brine the meat. Simply pat the chicken dry with paper towels after removing it from the brine.